Pressing crayon to set color

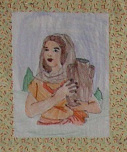
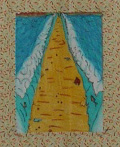
I received some excellent feedback from Dottie Bailey, a quilter on the Quilting Board forum (www.quiltingboard.com), about the proper way to press the fabric and set the color after coloring it with crayons.

She said, use white towels with no texture. They need to be completely smooth or they will transfer the bumpy texture (to look like tiny dots in your crayoned shapes) and it will look…..not as good as I think it could. These tend to be the name brand, more expensive paper towels but you don’t use many sheets at a time. Also===very important—-place the towel over the page, iron well, and if the towel gets any color on it at all, which it most likely will, DO NOT reuse it. It will transfer the color from one page to another and ruin the second one.

You can also use copy paper. No problems with bumpy texture there, but you can only use each page once (like the paper towels ) because of the problems with transferring color from one page to another.

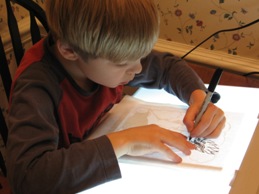
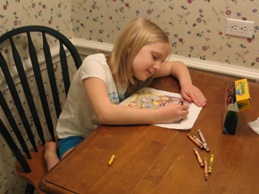
Play with a piece of fabric and a quickly colored page to test all of this and get used to it before doing the real thing. It’s not hard at all but you just have to be careful.

Dottie added that there might be a situation where a quilter might want to experiment with different textured paper towels for added effects, but probably not on one of these Bible quilt pictures.

Thank you Dottie for this very helpful information.

Bible quilts – a team effort

As much as I love the idea of making Bible quilts, and I hope and pray many will take this idea and “run with it,” I want to encourage youth leaders to think it through and have a plan for getting the final quilting done – sewing the top to the batting and backing.

And in the same breath I encourage quilters who catch this vision to step forward and offer to help the youth with this project. Perhaps a group of women might meet together on a regular basis and start a “quilting bee” for completing the quilt(s) started by the youth.

Use crayons to color a Bible quilt

Make a Bible quilt. The children can color the pictures.

Materials needed:
  • Bible story pictures from coloring books, Bible story books, or the Internet. (Note: Plans are under way to offer specially designed collections of Bible pictures for making Bible quilts on this web site.)
  • Large assortment of crayons (Crayola TM with 64 colors or more recommended) Crayon alternative: Fabric paints may be used but much are more tedious. Do not use cheap acrylic paints as they will not hold up in the laundry.)
  • Ultra-fine-point Sharpie permanent marker, Faber-Castell Pitt artistic pen (Indian ink) or other ultra-fine-point fabric marker
  • Roll of plastic or wax coated freezer paper
  • 2-4 yards of white or bleached muslin or quilting cotton
  • Additional fabric and batting to complete the quilt

Highly desirable:

  • Large light box for tracing patterns
  • Access to scanner or copy machine
  • Computer to enlarge or reduce picture size

Procedures:

    • Select pictures and plan to make them all the same size.
    • Copy, scan, or trace pictures onto copier paper if you plan to use a light box or alternative light source for tracing the picture onto fabric. (Note, you can’t just tear out a coloring book page as both front and back will show through when you use the light box.)
    • Using a copier or computer, enlarge or shrink picture as needed to fit fabric size.
    • Cut fabric pieces allowing an additional ¼ to ½ inch on all sides for seams.
    • Cut freezer paper the same size as the fabric pieces and iron it to the back of them using the cotton or wool setting on the iron. Do not use steam. The freezer paper will stiffen the fabric while you trace and color.
    • Wesley tracing picturePlace a drawing under a piece of fabric pressed onto freezer paper with the  fabric side on top. Tape the drawing to the fabric to keep it from slipping, and trace the picture onto the fabric. A light box is almost indispensable here, however a lamp and a glass top table may be used, or the drawing and fabric may be taped to a well lit window for tracing.


    • Erica coloring pictureColor the pictures on the fabric with Crayola crayons. If your fabric is not 100% cotton, you will need to purchase special fabric coloring crayons and will have fewer colors to choose from. Color as evenly as possible. Crayons may be used lightly as in coloring the sky, or it may be colored in very heavily for deep rich colors. Both will come out okay.


  • With the tracing paper still attached to the fabric, place a paper towel over the picture and iron it using the wool setting. Do not use steam. Use another paper towel and repeat as often as necessary until no color transfers to the towel.
  • The picture is ready to peel away from the freezer paper and sew into the Bible quilt. (Note: If you wish to add more color you may do so and iron again.)
  • Alternative solution to using freezer paper and light box: You may be able to see through the fabric alone well enough to trace without a light box. It is also possible to color on the fabric without the freezer paper if you place the fabric over a piece of sandpaper to hold it steady as you color.
  • Quilt assembly: Arrange your pictures in rows on the top of a bed to arrive at a plan for sewing the pieces together. Sew a strip of fabric (sashing) between each picture using the size seams you decided on earlier. Measure and adjust the size of the sashing as needed to get each row to come out to the same length. Sew a strip of sashing between each row, at the top and bottom, and up and down each side. Then cut a wider strip of fabric to make a border to go around the pictures. If you are not a practiced seamstress, look for an experienced quilter to guide you as you assemble and complete your quilt. Contact one of the quilt shops or fabric shops in your area if you don’t know any quilters.


Children Making Bible Quilts

I’m a kid again! I just brought home a whopping big 184 Crayola crayons to make Bible quilts. Add that to the 24 crayon box I already had and I now have 208 crayons. I bought them to help children make Bible quilts.

Erica colors one of her Bible quilt pictures. 

Wesley is using the light box to trace a picture for the Bible quilt. 

I started making Bible story quilt blocks with my grandchildren last week. With the help of a light box we traced the pictures from coloring books onto cotton muslin fabric, then the children colored the fabric blocks.

My oldest grandson, Jonathan, is exceptionally artistic, and he drew his own pictures from scratch. He also painted some of his blocks using textile paints.

Here are a few things I learned along the way:

  • You can trace Bible pictures from wherever you find them, not just coloring books. Consider copyright laws, especially if you plan to put your quilt in a public place. You may need to look for pictures that grant copying privileges. One such coloring book is Favorite Bible Stories to Color by Standard Publishing who allows their book to be copied for church and non-profit activities.
  • The light box makes it easier to trace the pictures, but only if you copy them to a regular piece of paper first. The picture on the back of a coloring book page will show through when you use a light box. You can use tracing paper, a scanner or a copy machine to copy the pictures.
  • The cloth blocks are much easier to handle if you iron a piece of freezer paper to the back first. Then they will lie flat for tracing and for coloring.
  • If you don’t have a light box, it is possible to trace through the fabric alone without the freezer paper, but it is more difficult to keep it flat and the design is harder to see.
  • Sandpaper can also be used to hold the fabric still while you color if you don’t have freezer paper. Just put the rough side of the sandpaper up and lay your fabric on it.
  • Crayola crayons work fine for 100% cotton fabric. If you use polyester fabric you will need to purchase special fabric coloring crayons but your number of colors will be more limited.
  • The larger the box of crayons, the better your pictures will come out. I tried to color a Noah’s ark picture with a box of 24 crayons. It had only one brown so it was very difficult to color the animals correctly. It is very difficult to mix crayon colors on fabric. You will need a wide variety of browns, tan and skin tone colors. Remember that Bible characters had darker skin.
  • After coloring the fabric, place the quilt blocks between pieces of paper towels and iron until the wax is transfered from the fabric to the paper. The color will remain in the fabric.
  • Fabric paints can also be used to paint the Bible pictures, but this is much more difficult and takes much longer to complete. I would only recommend fabric paints for older children who have some experience painting detailed pictures.
  • I wish coloring books were square. I could include more pictures and arrange them more easily if they were all square and a little smaller than the size of a typical coloring book page. A scanner and a computer, if available, can be useful in enlarging or reducing portions of pictures to fit into uniform square blocks.

Rachael as colored by Erica, and the parting of the Red Sea painted by Jonathan who preferred to paint this picture without using the coloring book pages. 

This is as far as I’ve gotten with my child-created Bible quilt project so far. I plan to share my grandchildren’s quilt blocks with a group of quilting women this week for tips on how to proceed in selecting fabrics for the back and edging of our quilt.